Unfortunately, sometimes sites are added to profiles by people who don’t actually own the site in question and in order to put a stop to this unfair practice we now ask bloggers to verify their sites. Verifying your website is the best way to show prospective brands that you are the genuine owner of a website and are able to collaborate with them with content based assignments.
Verifying your site only takes a couple of minutes so it’s well worth going through the steps to make sure you are seen as a genuine and honest blogger. Follow this guide to verify your sites:
- Log into your Get Blogged Account. Click on your avatar in the top right-hand corner of the screen.

2. Click on ‘your profile’ menu option

3. Scroll down your profile page until you find the ‘websites’ section.

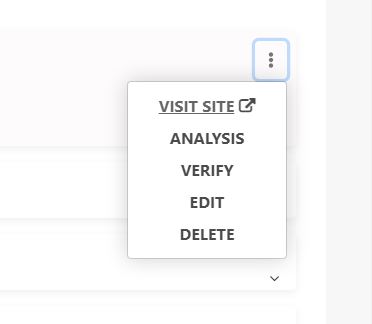
4. Click on the three blobs parallel to your website name and click the ‘verify’ menu option.

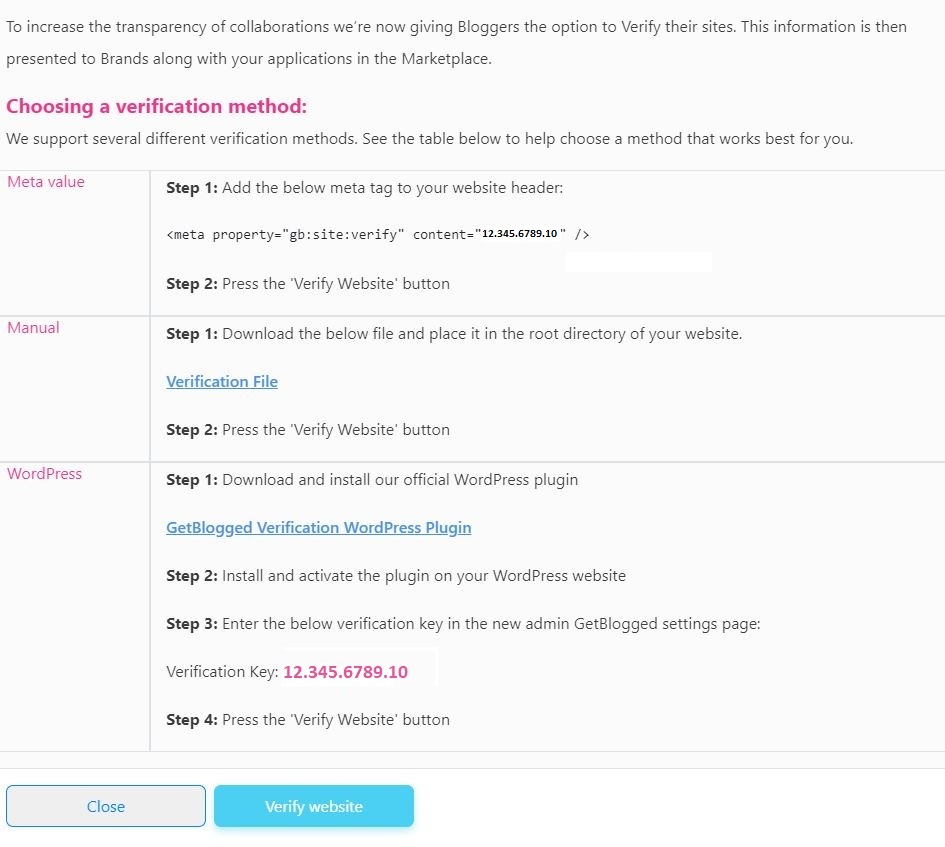
5. You will be presented with 3 methods for verifying your site.
Method 1: Add a meta tag to your website header. Copy and paste the HTML code provided into the header of your site.
Method 2: Download a file and place it in the root directory of your website.
Method 3: If you are a WordPress user then using the WordPress Plugin is by far the quickest and easiest way to verify your site.
Once you have completed your chosen method click the verify website button.


If your verification is successful a green tick will appear next to the website on your profile.
Please find an instructional video below for extra help.
If you have any trouble verifying your website please contact us.


 rated
rated


![6 ways to collaborate with bloggers this Thanksgiving [with case studies]](https://getblogged.net/wp-content/uploads/2022/10/pexels-rodion-kutsaiev-10060431-300x300.jpg)


